
Adding a live course will allow you to advertise your course on a national level to your direct audience, digitally distribute CE Certificates, administer surveys, and keep all your attendance records from one secure platform.
Add a Course Option 1: From your Dashboard
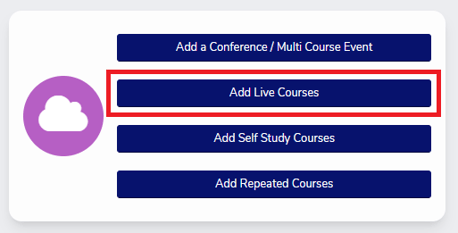
Step 1: Find the Add Courses Box and click "Add Live Courses" located on the right side of you dashboard
Step 2: Fill in all the required fields (how to descriptions below)
Step 3: Click Save
Add a Course Option 2: From the Navigation Menu
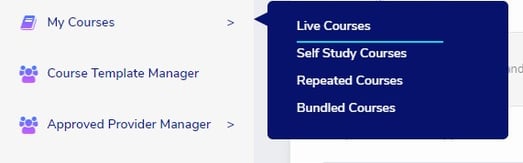
Step 1: From the navigation menu click on "My Courses" then "Live Courses"
Step 2: Click "Add Course" in the upper right
Step 3: Fill in all the required fields (how to descriptions below)
Step 4: Click Save

Add a Course Option 3: From the Course Template Manager
(This option only available if you have created course templates)
From the Navigation Menu:
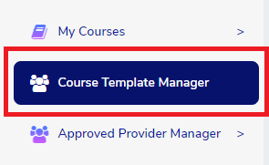
Step 1: Click on Course Template Manager
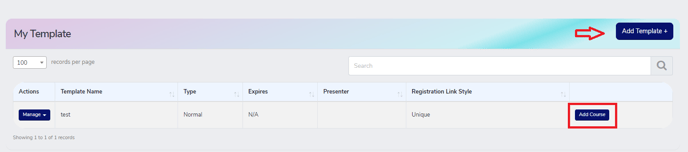
Step 2: Click "Add Template" in the right hand corner or "Add Course" next to the template associated with course
Understanding the Course Wizard
*Required Fields: Before you will be able to save your course all required fields will need to be filled in. If a required field is left blank, your course will not post. However, you can save the course as a draft and return to it later. The course wizard will highlight anything incomplete in RED. Additionally, the Wizard will show which section is missing information with a RED icon.
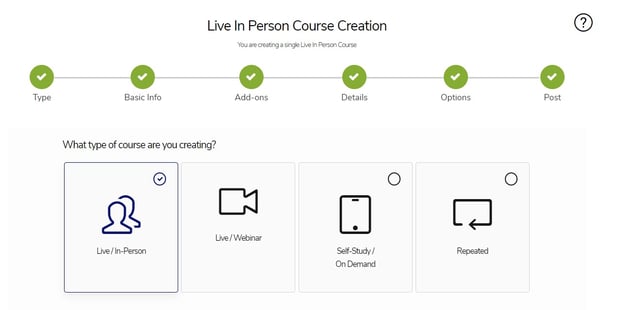
1. Select what type of course you are offering
-
- Select Live/In-Person if the attendees are attending your course at a physical address
- Select Live/Webinar if your course is being live-streamed
*If this is a pre-recorded course, select Self-Study/On Demand.
Click here for How to Add a Self-Study Course
Click Save and Continue at the bottom.
2. Add Basic Info
A. Associated Conference:
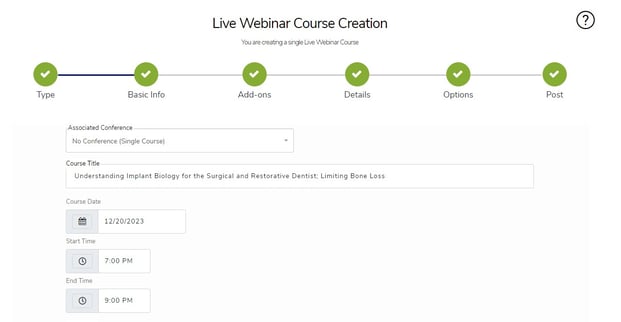
For a single course, do not select "conference". For more details on creating a conference refer to How to create a conference article.
B. Enter in the Course Title, Course Date, Start and End Times, Time Zone.
This is the course title that the professional will see when they search for or view the details of a course.
Start and End times are not tied to the calculation of CE credit hours you will be issuing.
Start Time: This is the time your event starts. You can choose to input the time you want your attendees to show up or the actual time the course starts
End Time: This is the time at which your course is scheduled to conclude. Please note the end time is tied to the verification button. CE Zoom's verification buttons will only be active for professionals to verify to receive their CE Certificate 15 min prior to the scheduled end time of your course. If your event ends 30 min early please note that your attendees will not be able to verify the course until 15 min prior to the chosen end time.
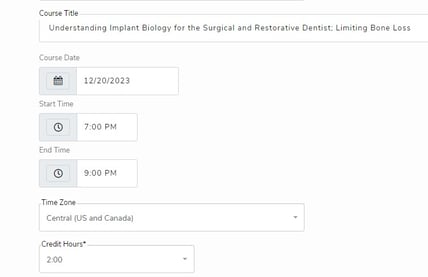
This is the time zone for the address of your course. If you are offering a webinar you can select the time zone for which your presenter will be presenting.
C. Total CE Credits
Input the total number of CE credit hours for this course. Credit hours are issued according to a 1:1 ratio. 30 min = . 5 CE credit hours, 60 min = 1 CE credit hour. CE Zoom can manage credit hours to the quarter-hour.
D. Presenter
-
-
- DO NOT add a new presenter without first searching to see if your presenter already exists on CE Zoom.
- DO NOT add a new presenter without first searching to see if your presenter already exists on CE Zoom.
-
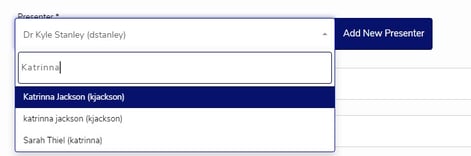
How to Find your Presenter
-
- Click on the presenter search field to expand the list of presenters and search for you presenter by typing in part or all of their name (when searching it is better to search by typing in only 3-5 letters of their first or last name).
- If your presenter is listed, click their name to select them.
Presenter Not Found
-
- Click Add new presenter
- Enter in their first name, last name, and email
- Click add presenter, this will create their initial account, send them a welcome email, and attach them as a presenter to your course
Presenters' email already exists: this means that the email you entered is already attached to an account within CE Zoom. If your presenter was not found in the search field they probably only have a professional account, therefore they are not searchable as a presenter.
What to do NOW:
1. Presenter: Search and select Presenter Profile Coming. This will allow you to proceed with your course posting and save the course. Once your presenter was a presenter account you can edit the course and attach the presenter.
2. Create a ticket at support.cezoom.com when you have posted your course and ask the CE Zoom support team to please add a presenter account to your presenter. Please include your presenter's first and last name and the email that is associated with the presenter. Once CE Zoom support adds a presenter account your can update your course presenter field.
E. Additional Presenters
If your course has multiple presenters, we need to make sure all presenters are listed on the CE Certificate. Please type in the additional presenters in this field and their names will be added to the user's CE Certificate for this course. Please note that the Presenters' names in the additional presenters field will not be displayed under the course details. It is on our priority list to allow multiple presenter profiles and pictures to be attached to a single course. Currently, we suggest adding all presenter's names and/or pictures under the course overview if you have multiple presenters.
Fill in "Name of Person adding course" and their "Contact Email."
**This email will not be shown publicly
Click the Save and Continue
3. Add-Ons
A. AGD Joint Providership
Do you have your own AGD or will you be using AGD/PACE Joint Providership?
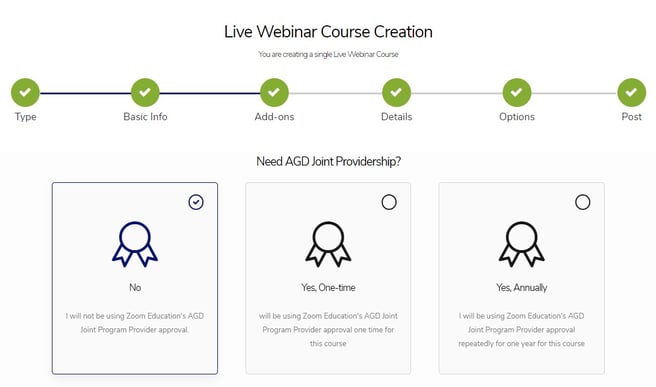
A. If you have your own provider affiliation or do not wish to have a program provider approval select no
B. Yes, One Time - if you are only offering this course 1 time, this is your best option.
C. Yes, Annually - If you will be offering this course multiple times throughout the year, select this option.
If you have your own provider affiliation or do not wish to have a program provider approval you can select no
**If you select Yes to either of Zoom's Educations Joint Providership options your course will be stored under your pending courses until approved. Once your course is approved it will be released and you will have access to the registration link.
If you select one of the Joint Providership options, the price will be displayed.
When you select Yes to using Zoom Education's AGD, you will be prompted to pay before continuing!
**Using CE Zoom's / Zoom Education's AGD PACE Joint Providership:
1. You must include Zoom Educations AGD logo/provider statement
These must be displayed in the certificate, the overview, and advertising materials.
AGD logo:

AGD PACE Joint provider statement:
This activity has been planned and implemented in accordance with the standards of the Academy of General Dentistry Program Approval for Continuing Education (PACE) through the joint program provider approval of Zoom Education, LLC, and (Your Company Name). Zoom Education, LLC is approved for awarding FAGD/MAGD credit.
B. Need Advertising?
Selecting Yes, alerts the advertising department that you have an interest in using CE Zoom's advertising options to market this course. At the moment, our weekly newsletter is limited to only webinar's and self-study courses.
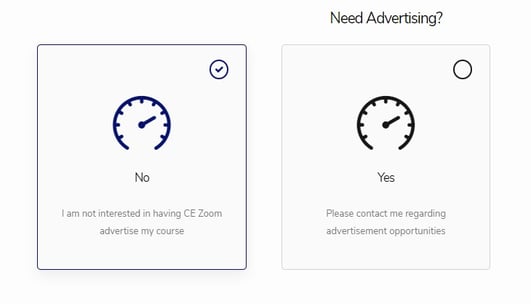
Click Save and Continue
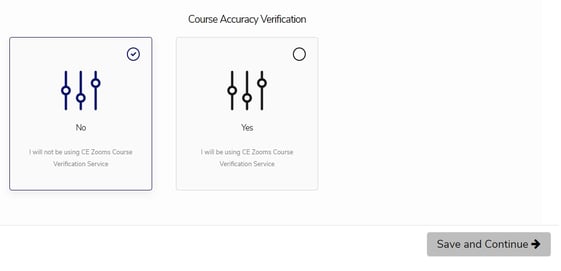
C. Need Accuracy Verification?
4. Details
A. Course Category
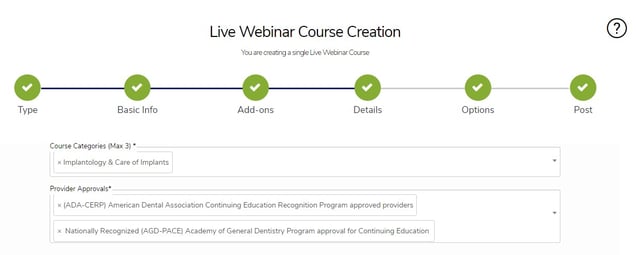
**This is very important as it will be applied and tracked against your state rules and regulations.
For course categories, we prefer that you pick the best match but you can go up to 3 if you would like. However, only select a course category if your course can satisfy that course category alone.
Example: if you are presenting an infection control course that meets states requirements for infection control you can select "Infection Control" as a course category, but if you presenting about a new product and talk about proper infection control protocols for that particular product, you can not select infection control as a course category for your course will not satisfy the infection control category on its own.
B. Provider Affiliation
Select all provider affiliations you are recognized or certified by. If you have no provider affiliations select "None".
If you are using Zoom Education's AGD, please select the Nationally Recognized (AGD-PACE) option. If also using ADA, please select (ADA-CERP) American Dental Association Continuing Education Recognition.
C. California Provider Number
If your course has been approved by California, input the course provider number above
D. AGD Subject Code
-
- This field only shows up if you selected AGD as a provider affiliation
- This field is important for AGD members and the submission of attendees to the AGD. Please pick the correct subject matter. More details on the AGD subject codes can be found at: AGD Subject Codes
E. Credit Verification Code
This is the verification code you will announce at the conclusion of the course. The Professionals will enter this code to verify their attendance through their CE Zoom account to receive their CE Certificate. (How to Announce Verification Code)
Create your unique verification code:
-
- DO NOT use special characters (*&^%$<_, etc)
- DO NOT use spaces
- Be careful of the combo of letters you use, some lower case and upper case letters are hard to distinguish unless used within a word. Upper case i and lower case L's look similar (Il), capital O's and zeros look similar (O0).
- This code is case sensitive
F. Certificate Template (not required initially, but mandatory)
Select the certificate template from your library. If you have not created a CE certificate before adding the course, save where you are, create your certificate, (How to Create a CE Certificate), and return to editing the course by clicking the magic wand and attach the CE certificate. If you forget to attach a CE Certificate prior to an attendee verifying to receive their CE Certificate you will be charged a re-run fee to fix and update the course.
G. Education Method
Education Method: There are 3 options
1. Lecture: an educational talk delivered to a selected audience
2. Discussion: an educational discussion that includes exchangeable learning from the speaker and the audience
3. Clinical Participation: 30% or more of the course involves active manipulation of dental materials or devices, treatment of patients, or other opportunities to practice skills or techniques under the direct supervision of a qualified instructor
H. Survey Type
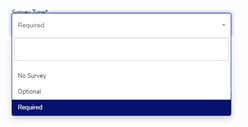
1. From the drop-down menu, select if you are requiring a survey. If you are using Zoom Education AGD, a survey is required.
** Please note, your attendees will be required to complete in full, the attached survey prior to their CE Certificate being released to their account After the attendee verifies the course, CE Zoom will display a message letting the attendee know the course has a required survey and leads them directly to the survey. Once the survey is complete then the CE Certificate will be released to their account.
2. From the drop-down menu select the survey you created for this course. It is very important to create a new survey for each course to keep your results specific to each course. If you have not created a survey before adding the course, save where you are, create your survey (How to Create a Survey), edit the course, and attach the Survey.
I. Adding a Test to a Live Course
There are three options for adding a test.
No Test, Required for All or Required by State.
There are some states that require a test in addition to verifying a Live Webinar in order for the CE to count. If a professional from one of these states takes your course and there is no test, your CE will not count. It is recommended, therefore that you at least select Required by State as this option will automatically require attendees from those states to take and pass your test.
However, more and more states are moving in that direction with Live Webinars so you can also choose, Require for All. This will ensure that everyone is covered should their state start mandating tests for Live Webinars.
*If you are using Zoom Education's AGD, surveys and tests (Required for All) is mandatory.
J. Overview
This is the course overview that the professional sees when they view your course. This is the main area where you can describe your course in detail and/or list the learning objectives, in a free form format. You can add pictures, tables, and hyperlink text to direct professionals to handouts/ syllabus that you have uploaded to your website.
K. Audience
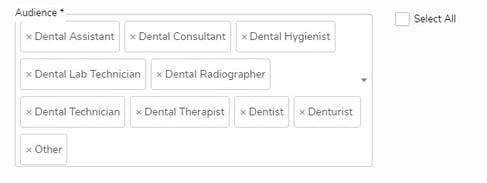
This is a multi-select field. Select all audience types to which this course applies, or you can check the Select All box.
L. Max Attendance
Input how many attendees your course can allow. If you are using CE Zoom's paid registration this number will be used to calculate the total number of seats allowed to be sold per course, currently, it is a read-only field for all courses not utilizing CE Zoom's paid registration.

M. Tuition
This is a read-only informational field displayed to professionals when they do a course search, are registering, or viewing the course details. For a cleaner display of your tuition fees, we recommend inputting only the money value or range of cost for your event. We will display exactly what you input so do not forget your money signs.
Examples:
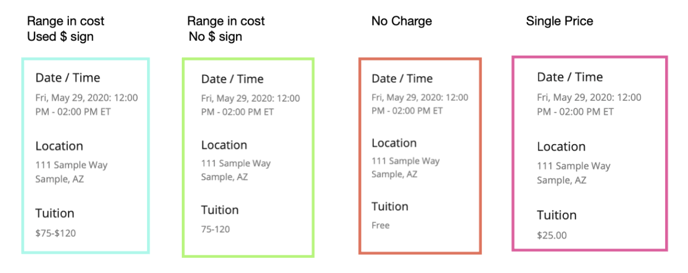
**If your course has a fee to attend, make sure you create a paid registration and attach it to your course. However, the registration should be added after the course.
N. Course Prerequisites
CE Zoom requires offering companies to disclose any and all prerequisites required prior to an attendee being able to attend the course. All Prerequisites will be displayed within the overview of each course under the heading Prerequisites when a professional views the course details. If your course has no prerequisites you can list none.
O. Is this Course Sponsored

Select No, if this course is not sponsored
Select Yes, if it is sponsored. The next field will only show up if yes is selected for "Is this course sponsored". List the names of all the sponsors in the field. The sponsors will be displayed within the overview of the course under the heading Sponsors.
P. Conflict of Interest Disclosure

Each course listed on CE Zoom must disclose all conflict of interest affiliations. The conflict of Interest Disclosure selection will be displayed within the overview of each course under the heading Conflict of Interest Disclosure when a professional views the course details. Select the appropriate statement that applies to your course.
Q. Notes and/or Webinar Conferencing Information and Webinar Link
Enter any additional notes here you want your attendees to be aware of. Examples: Please make sure you bring 2 pairs of gloves, a mask, and eyewear or please note the course will be held in the courtyard, we advise you to arrive 10 minutes early.
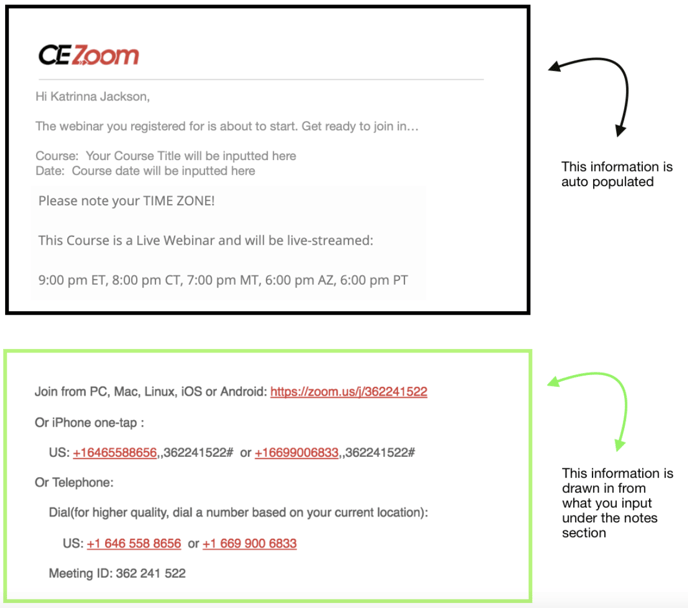
Live Streamed WEBINARS: If your course is a live-streamed webinar you must enter the webinar link and any other webinar conferencing information within the Notes and/or Webinar Conferencing Information field. CE Zoom will send all information you input into the Notes and/or Webinar Conferencing Information field to your registered attendees 24 hours and 1 hour prior to your scheduled time to remind them that the webinar they registered for is about to start.
Automated Webinar Notification Example:
R. Contact email for Webinar Info

The contact email listed in this field will be displayed to all registered attendees should they need any assistance with your webinar. This statement will be displayed for all courses flagged as a webinar within the join webinar information:
Please contact ({input webinar contact email}
-
- If the offering company chose not to display their webinar joining link on CE Zoom and you still need the link
- Your link is not connecting you to the webinar
- You have questions about joining the webinar
S. Coordinator and Contact Email
Coordinator - List the name of the person for the point of contact for this course
Contact Email - List the email you want your attendees or potential attendees to reach out to regarding questions they may have regarding this course.
Click Save and Continue
5. Options
A. Collecting Fees Through CE Zoom
Select Yes, if you will be collecting registration fees through CE Zoom's registration
** If you are collecting fees, remember to set up a registration for this course.
Select No, if your course is free, or you will be using an outside registration platform to collect your registration fees
B. External Reg Link
(this field appears if you choose yes to the question: Do you collect registration fees for this course on other sites besides CE Zoom. This allows us to direct professionals to your registration web page)
Input the URL associated with your registration web page
C. Post Course as Private
Select No, if your course is intended for the public. By selecting NO your course will be searchable on CE Zoom's course search engine.
Select Yes, if your course is intended for a private group or for invited attendees only. By selecting yes your course will not be searchable on CE Zoom's course search engine. After your course is posted you will have access to the registration link to pass out to your selected invitees.
D. NPI Required
Select No, if you are not issuing any sample products or are issuing sample products that are not required to be reported by the Sun Shine Act.
Select Yes, If you are required by the Sun Shine Act to collect the Dentist's NPI # prior to issuing them a CE Certificate. If this is marked as yes, a dentist that attends your course will not be able to complete the verification process to receive their CE Certificate until they provide their NPI #. Usually, this field is necessary if you are offering samples of pharmaceutical-type products. If you have any questions as to whether or not you should be collecting NPI numbers, visit CMS.gov 
E. Automatically Confirm Attendees
Yes: By selecting Yes, your attendees will automatically have their attendance confirm and be issued their CE Certificate if they verify the course with the correct course completion verification code you announced at the conclusion of the course.
Pros:
-
- You will not have to manually confirm each of your attendee's participation.
- After your course is posted you are pretty much done with the management of this course.
No: Select No, if you wish to continue with the 2 step authentication process prior to your attendees receiving their CE Certificates. By selecting no, you will be required to confirm each attendee's participation prior to them receiving their CE Certificate.
Pros:
-
- You have complete control on who is confirmed to receive their CE certificate (How to Confirm Attendees Attendance)
1. Contact Information for the person responsible for Confirming attendance to your event
Input the person that will be in charge of confirming attendance on CE Zoom for your event. The contact email for confirming will be visible to all registered attendees should they have questions as to why their attendance has not been confirmed. The contact email will auto input the email that was inputted under the contact email for the course, however, if the contact email for the person responsible for confirming attendance is different please add the correct email.
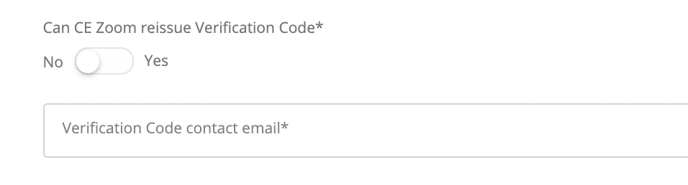
F. Can CE Zoom re-issue the verification code for this course? Yes or No
If an attendee to your event reaches out to CE Zoom Tech Support asking for the verification code to your course we will refer to this setting on how you want us to manage the request.
YES: If you mark yes CE Zoom Tech Support will gladly re-issue the verification code when a professional reaches out stating they do not have the verification code.
NO: If you mark no, CE Zoom Tech Support will direct the professional requesting a verification code to the contact email inputted in the Verification Code Contact email field.
Things to be aware of prior to marking yes or no.
-
- If you set your course to autoconfirm then it is highly recommended to say no to allowing CE Zoom to re-issue codes as there will be no safeguard as to whether the professional actually attended.
- If you will be confirming attendance manually then allowing CE Zoom to re-issue the verification code could be a good idea as only those professionals you marked as attending will receive credit. So if a professional did not attend and CE Zoom re-issued the code, that professional will still not receive credit, until you the offering company confirms them. It is recommended, when confirming attendance, to mark all attendees not eligible to receive credit if they did not attend or did not attend long enough so they can not accidentally be marked confirmed.
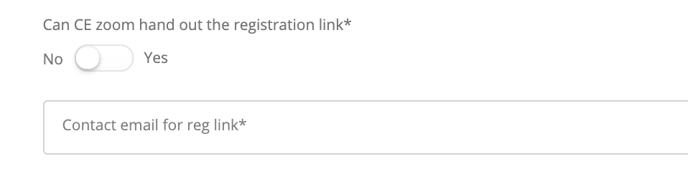
G. Can CE Zoom hand out your registration link?
YES: Should a professional reach out to CE Zoom's tech support before the event asking for the registration link to register or after the event because they stated they attended but never registered on CE Zoom, then CE Zoom will send them the registration link for this course/event
NO: If you mark no, CE Zoom Tech Support will direct the professional requesting the registration link to the contact email inputted in the Contact email for the registration link field.
Possible situations in which you might select No:
-
- The course is marked private and you want to monitor who can register
- The course has a paid registration being managed outside of CE Zoom and only those professionals that paid through your site should have the CE Zoom registration link (these courses are usually marked private also)
H. Will this course be recorded, re-played, or turned into self-study
This information will be visible to professionals.
NO:
If no is selected we will display under the course details that this course will not be re-played or turned into a self-study
YES:
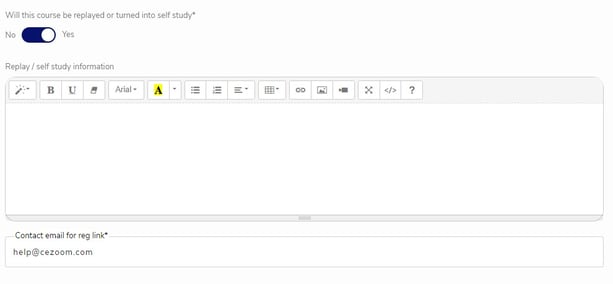
A text box will appear that will allow you to input any information you wish about future dates this course will be offered with their registration links. If you will be turning the course into a self-study course after the course is over, please input instructions regarding when the self-study will be available. This field will be editable after the course is over so you can come back and input the self-study registration link. There is also a contact email that is required so professionals can reach out to obtain future registration links and/or self-study registration links.
I. Will you be issuing handouts for this course?
This will be visible to registered attendees only!
NO:
If no is selected CE Zoom will state that no handouts will be issued.
YES:
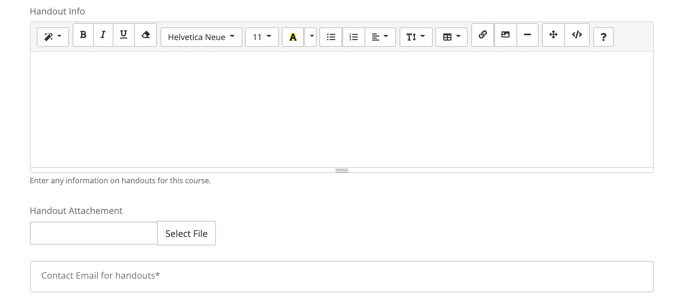
A text box will appear where you can input information about the handout, such as the handouts will be available as soon as the presenter has them ready.
If you have the hand out you can upload it to the course and the registered attendee can view and print the handout.
We also ask for a contact email in case the professional has any questions regarding the handouts. This email will be auto-filled with the contact email on file, however, if you want to direct the attendees to another coordinator or the presenter themselves you will want to update their email here.
6. Post
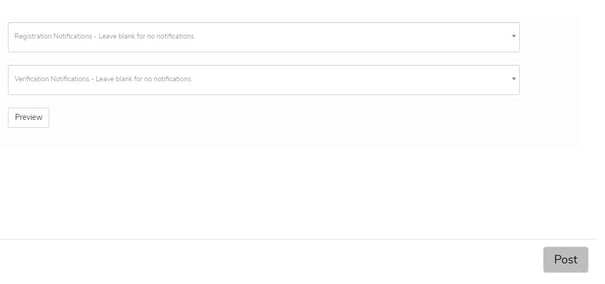
A. Registration Notifications
If one or more professionals register for this course a notification email will be sent to the selected recipients. This is a multi-select feature.
Company: an email will be sent to the email associated with the company account that is posting the course (you).
Presenter: an email will be sent to the email associated with the attached presenter
Coordinators (ex: Katrinna Jackson): an email will be sent to the email associated with the selected coordinators. To add coordinators please refer to How to Add an Account Coordinator Article.
B. Verification Notifications
If one or more professionals verify for this course a notification email will be sent to the selected recipients
Company: an email will be sent to the email associated with the company account that is posting the course (you).
Presenter: an email will be sent to the email associated with the attached presenter
Coordinators (ex: Katrinna Jackson): an email will be sent to the email associated with the selected coordinators. To add coordinators please refer to How to Add an Account Coordinator Article.
C. Click the Agree to Terms and Services
D. Click "Post." If "Save Draft" is showing at the bottom, review your upload by clicking on the red highlighted area
You can edit your course as many times as you need up until a professional has verified against the course to receive their CE Certificate for the course, at which time it becomes a record on your account and is a view-only document.
All your live courses will be displayed on your dashboard under "Upcoming or Recently Completed Courses" or under "My Courses" "Live Courses" or "Pending Live Course" from the navigation menu.