
Each course you offer will need a CE certificate.
This CE Certificate will be the official proof of attendance record for your course.
How to create a CE Certificate:
Step 1: Log into your Company Account
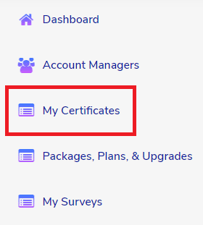
Step 2: Click My Certificates on your company dashboard
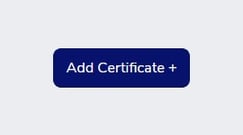
Step 3: Click Add Certificate in the right hand corner
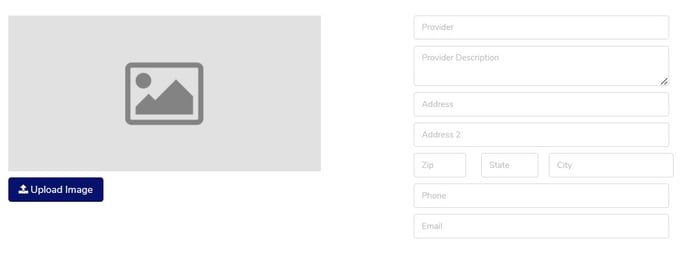
Step 4: Start designing your certificate.
Upper Left Upload Image: this is where you put the offering companies logo
Upper Right Provider Info: this is where you will enter the offering company's information (not the presenter's info). Any fields not filled in will not be displayed.
Course Attendance Verification Info Section:
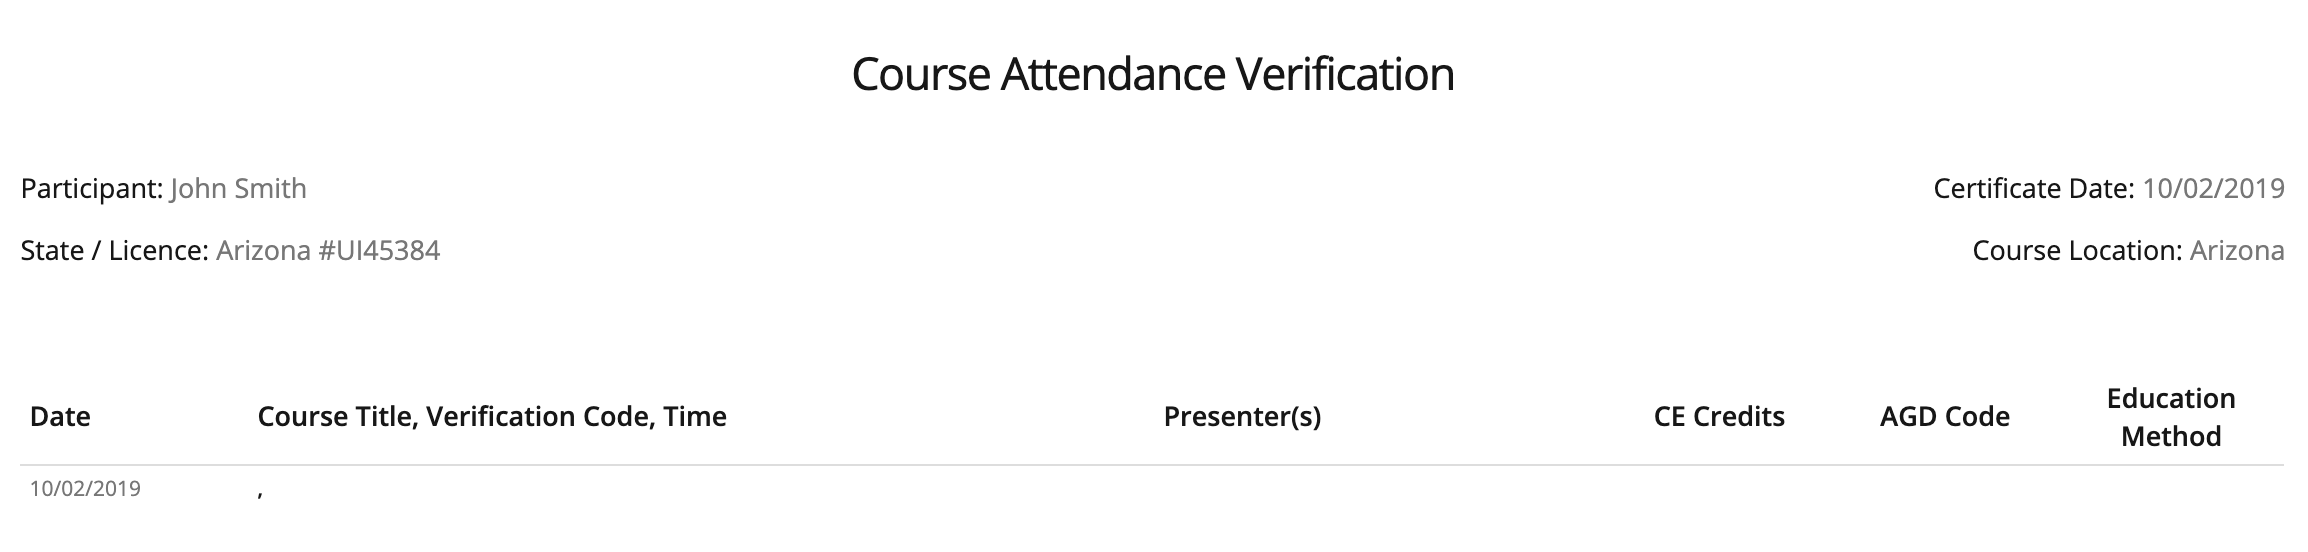
You can not enter in or change any of the fields in the pictured section above (Participant, Certificate Date, State/License, Course Location, Date, Course Title, Verification, Code, Time, Presenter(s), CE Credits, AGD Code, Education Method) all this information that is displaying is all example data. These fields will be auto-filled in from the course details and from the professional's account once they verify the course.
Authorized Signature:
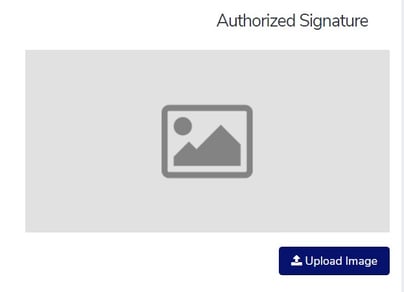
Upload the image of the signature for the person responsible for signing the certificate. For best results upload a digital signature, or sign the middle of a white sheet of paper, take a picture of the signature in bright light, and upload it. Do all the cropping of the photo when uploading the image to the certificate template. If you prefer to not have a signature on your CE Certificate leave blank and it will not display the Authorized Signature Title.
Signature Credentials / Title: Enter in the signer's name, title, and credentials

Additional Information:

If there is any other information you would like your certificate to display, enter it here. If this field is not utilized it will not be shown on the certificate. If the information added is specific to a course please note this information will appear on each course's CE Certificate that you have attached this CE Certificate too. If you add specific information we recommend naming the CE Certificate specifically after the courses it is intended for so you do not accidentally attach it to the wrong course
Additional Upload Images and Image Descriptions:

There are 3 more image uploads you can utilize at the bottom of the certificate template. These are for any provider affiliation logos and you need to display on the certificate with an area to type in any disclaimer statements or you can be creative and upload anything you want to display on your certificate. Helpful Hint: I prefer to design my logo & wording layouts in photoshop, pages, or other software, take a screenshot, and upload the image so I can control the layout of the design.
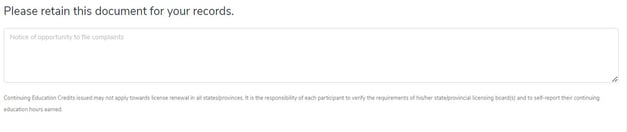
Notice of opportunity to file complaints: Most provider affiliations require you to list how a professional can file a complaint.
Step 5: Select "Preview" if you click Cancel then any changes will not be saved.

Step 6: Select "Save" if you are satisfied with your certificate or "Keep Editing" if you see any errors.

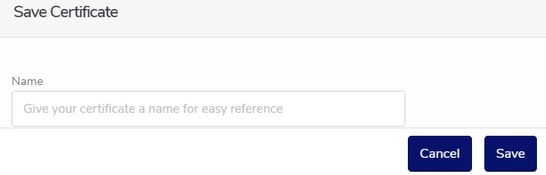
Step 7: Name your certificate and select "Save".
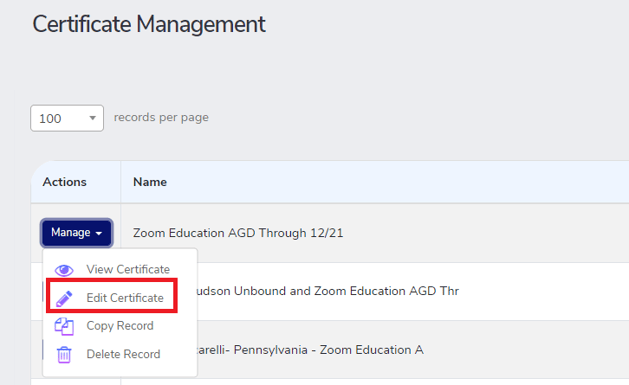
Your certificate is now created. You can edit it as many times as needed until a professional has verified a course it is attached to it. All your certificates will be located under "My Certificates". Click Manage and Edit Certificate. Once a certificate has been verified against it will become a view-only document, no changes can be made.
You can use the same certificate for multiple courses as long as all the information on the issuing certificate is correct for each course it is attached to. If any of the information needs to be updated (logo, address, signature, provider affiliation, expiration dates, etc) you can quickly create a duplicate certificate, update the needed fields and save with a new name (How to create a duplicate CE Certificate).