Surveys / Course Evaluations give valuable feedback. You can design a survey to fit your needs and make it optional or required.
You will want to create a NEW survey for each and every course your offer (How to create duplicate surveys). If you use the same survey for each course, all your results will be complied together and you will not be able to distinguish results on a per course bases.
To create a survey...
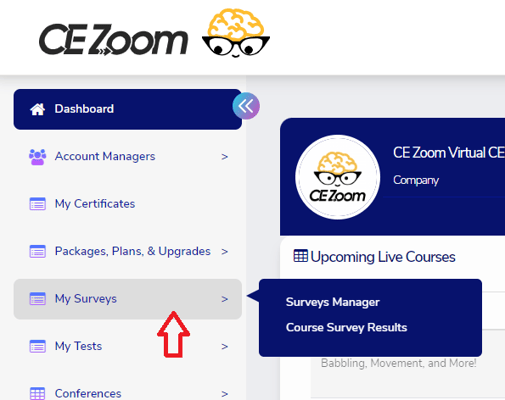
Step 1: From the navigation menu select "My Surveys" then "Survey Manager"

Step 2: Select "Add"

Step 3: Creating your Survey
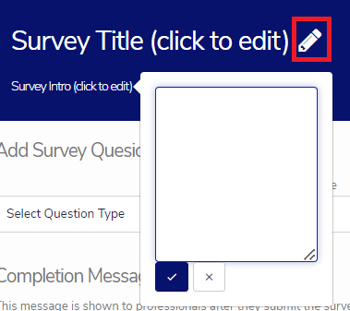
Survey Title: *Mandatory Field" Hover over the heading "Survey Title" and click on the click to edit.

Enter the title for your survey.
Single Course: We recommend this being the title of your course.
Conferences: We recommend this being the title of your event
Click the blue check ![]() to save changes.
to save changes.
Survey Intro: Hover over the heading "Survey Intro" (second line) and click on the pencil to edit.

This is an optional field. If not used the heading title "Survey Intro" will not show.
Single Courses: type in- Presented by: "name of presenter"
Conferences: Type in the title of the course, click return and then Type in Presented by: "name of presenter"

Click the blue check to save changes.
Adding Survey Questions: From the drop-down menu, select one of the three question types and click "Add". Repeat for each additional question you choose to add to the survey.

1. Free Form: answers will be fill in the blank
2. Multiple Choice: you can customize up to as many answers as you want
3. Multiple Choice w/ Other: this allows you to ask a multiple-choice question with the last option to be fill in the blank. Example: Q: What is your job title? DMD, DH, Assistant, Other. If the professional chooses Other, a text box would appear and they will type in their answer.
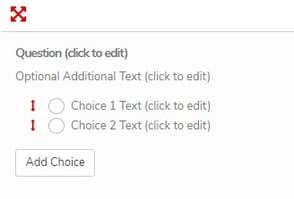
Entering the Question *Mandatory Field" Hover over "Question" and click on click to edit.

Type in the question you wish to ask
Click the blue check ![]() to save changes.
to save changes.
Optional Additional Text As stated this is optional. Hover over "Optional Additional Text" and click on, click to edit. Click the blue check ![]() to save changes
to save changes
Entering the Answers Hover over choice 1 and click on, click to edit. Add an answer. Click the blue check to save changes. *A minimum of 2 choices is mandatory. To add additional choices click "Add Choice" for each additional choice you would like to offer. Free Form Questions will not have answers.
Deleting a Question or Answer click the trash icon associated with the question or answer you would like to delete.
Switching the Order of your Questions to re-arrange the order of your questions, click on the double-crossed arrows  and drag the question to re-order.
Completion Message this message is shown to professionals after they complete the survey. *Mandatory Field

Survey Name *Mandatory Field This name will be used internally for you to reference when attaching the survey to a course. Helpful Hint: We recommend naming the survey in a way to help you distinguish each unique survey. Creating a survey name with this data is best: course date, time, presenter, title.

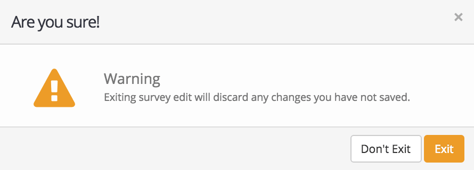
Step 4: When the survey is complete or you need to finish later, select "Save"  at the bottom of the survey template. If you accidentally select the "Exit" button you will be given a warning message requiring further action. If you click exit again all info will be lost.

Survey Not Saving

If you click Save and you are not advanced to the next screen and you receive the above message, you might have missed a required field. Scroll back up through your survey. All required fields that do not have any data will be highlighted red for quick recognition of what is still required prior to saving.

You can edit the survey as many times as needed up tell a professional verifies the course the survey is attached to. After which the survey will become a read-only document

