
Start by selecting the event type to get guidance specific to that kind of event.
How to register for a single live in-person, virtual course or self-study course
How to Register for a single live in-person, virtual, or self-study coruse on CE Zoom
Step 1: Click the Register Button
If the button says "Event Has Ended, Register to Verify", this means the event has already occurred.
-
You should only register in this case if you attended but didn’t complete your CE Zoom registration beforehand.
-
This allows the course to appear on your CE Zoom dashboard so you can claim CE credit.
-
⚠️ Note: If this was a paid event, no refunds will be issued, as warnings were provided that the event has ended.
Step 2: Log in or create an account
- If you are already a member and logged in, this step will be skipped
- If you are new to CE Zoom click 'Sign Up' and and create a professional account. Once your profile is created, you will be directed through the registration.

More Info: How to create an account on CE Zoom
Step 3: Select Your Registration Type
-
Choose the attendee category that best describes how you'll be attending (e.g., dentist, hygienist, student).

-
If your selected type is tied to a membership discount, you’ll be asked to confirm your membership.

-
Toggle "Yes" if you're a member.
-
Provide any required membership validation details (e.g., member number, email, or phone) for verification.
-
Step 4: Course Agenda
-
The course will be autoselected

Step 5: (Optional) Add Items from the Marketplace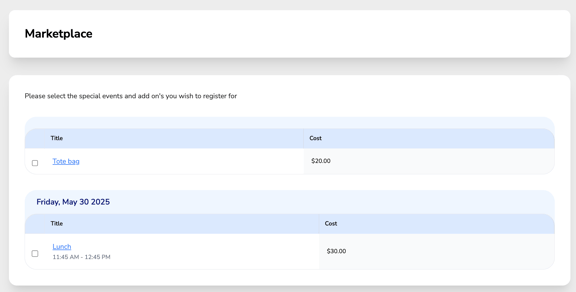
-
Some events offer add-ons like social events, meals, or extra sessions.
-
Click a Marketplace item to view full details.
-
Select quantity or any options if required.
Step 6: Agree to Terms
-
Read and agree to the terms and conditions to proceed.

Step 7: Review or Update Personal Information
-
Your details are pulled from your CE Zoom profile.
-
If anything needs updating, click “Update My Profile Info,” make changes, and click “Save Changes.”

⚠️ A valid ZIP code is required to complete registration, due to state-specific tax collection.
Step 8: Apply Promo Code (if applicable)
-
Click “Apply Promo Code” and enter your code.

-
If the code is valid, the discount will apply.
-
If invalid, you'll see:

⚠️ Promo code not accepted. It might be expired, inactive, maxed out, or entered with the wrong capitalization.
-
To try a different code, click the red “Remove Promo Code” button and re-enter.

-
Step 9: Complete Payment
-
Fill out the Stripe payment form, agree to the payment terms, and click “Pay.”

-
If your registration spins or won’t complete, return to your personal information step and double-check that your ZIP code is valid and correctly saved.
Step 10: Confirmation & Dashboard Access
-
Once payment is complete, you’ll be directed to your confirmation page.
-
Your selected courses will now appear in your CE Zoom dashboard under “Scheduled Live or Self-Study Courses.”

How to Register for a Conference or Multi-Course Event on CE Zoom
Step 1: Click the Register Button
If the button says "Event Has Ended, Register to Verify", this means the event has already occurred.
-
You should only register in this case if you attended but didn’t complete your CE Zoom registration beforehand.
-
This allows the course to appear on your CE Zoom dashboard so you can claim CE credit.
-
⚠️ Note: If this was a paid event, no refunds will be issued, as warnings were provided that the event has ended.
Step 2: Log in or create an account
- If you are already a member and logged in, this step will be skipped
- If you are new to CE Zoom click 'Sign Up' and and create a professional account. Once your profile is created, you will be directed through the registration.
More Info: How to create an account on CE Zoom
Step 3: Select Your Registration Type
-
Choose the attendee category that best describes how you'll be attending (e.g., dentist, hygienist, student).
-
If your selected type is tied to a membership discount, you’ll be asked to confirm your membership.
-
Toggle "Yes" if you're a member.
-
Provide any required membership validation details (e.g., member number, email, or phone) for verification.
-
Step 4: Choose Your Badge (if applicable)
-
Paid Conferences will require selecting a badge type; Free Conferences will not.
-
Badges determine your access level and pricing.

-
Pay-per-course badges will display as $0.00, since you’ll be charged for individual courses.
-
Other badges may include full access or day-specific bundles.
-
Step 5: Build Your Agenda
-
Choose all the courses you want to attend.
-
If your badge limits access to specific days, only those days will be selectable; others will be grayed out.

-
If you select a course that is sold out, it will turn red, and you'll see a warning. You must remove that course before continuing.


-
Courses included with your badge will say "Included."
-
If a course has an additional cost, it will be clearly shown.

-
-
If you select a course that overlaps in time with one you've already chosen, a pop-up will appear asking you to decide which course you’d prefer to attend. This ensures your final agenda only includes courses you can realistically attend without time conflicts.

-
For courses offered in multiple formats (in-person or virtual), you’ll be prompted to select your preferred delivery method.

-
⚠️ If you haven’t selected any courses, you’ll receive a warning and will not be able to proceed.

Step 6: (Optional) Add Items from the Marketplace
-
Some events offer add-ons like social events, meals, or extra sessions.
-
Click a Marketplace item to view full details.
-
Select quantity or any options if required.
Step 7: Agree to Terms
-
Read and agree to the terms and conditions to proceed.
Step 8: Review or Update Personal Information
-
Your details are pulled from your CE Zoom profile.
-
If anything needs updating, click “Update My Profile Info,” make changes, and click “Save Changes.”
⚠️ A valid ZIP code is required to complete registration, due to state-specific tax collection.
Step 9: Apply Promo Code (if applicable)
-
Click “Apply Promo Code” and enter your code.
-
If the code is valid, the discount will apply.
-
If invalid, you'll see:
⚠️ Promo code not accepted. It might be expired, inactive, maxed out, or entered with the wrong capitalization.
-
To try a different code, click the red “Remove Promo Code” button and re-enter.
-
Step 10: Complete Payment
-
Fill out the Stripe payment form, agree to the payment terms, and click “Pay.”
-
If your registration spins or won’t complete, return to your personal information step and double-check that your ZIP code is valid and correctly saved.
Step 11: Confirmation & Dashboard Access
-
Once payment is complete, you’ll be directed to your confirmation page.
-
Your selected courses will now appear in your CE Zoom dashboard under “Courses That Are Part of a Bundle/Conference.”

How to Register for Bundle on CE Zoom
Step 1: Click the Register Button
If the button says "Event Has Ended, Register to Verify", this means the event has already occurred.
-
You should only register in this case if you attended but didn’t complete your CE Zoom registration beforehand.
-
This allows the course to appear on your CE Zoom dashboard so you can claim CE credit.
-
⚠️ Note: If this was a paid event, no refunds will be issued, as warnings were provided that the event has ended.
Step 2: Log in or create an account
- If you are already a member and logged in, this step will be skipped
- If you are new to CE Zoom click 'Sign Up' and and create a professional account. Once your profile is created, you will be directed through the registration.
More Info: How to create an account on CE Zoom
Step 3: Select Your Registration Type
-
Choose the attendee category that best describes how you'll be attending (e.g., dentist, hygienist, student).
-
If your selected type is tied to a membership discount, you’ll be asked to confirm your membership.
-
Toggle "Yes" if you're a member.
-
Provide any required membership validation details (e.g., member number, email, or phone) for verification.
-
Step 4: Build Your Agenda
-
Choose all the courses you want to attend.

-
If you select a course that is sold out, it will turn red, and you'll see a warning. You must remove that course before continuing.
-
If you select a course that overlaps in time with one you've already chosen, a pop-up will appear asking you to decide which course you’d prefer to attend. This ensures your final agenda only includes courses you can realistically attend without time conflicts.
-
For courses offered in multiple formats (in-person or virtual), you’ll be prompted to select your preferred delivery method.
-
⚠️ If you haven’t selected any courses, you’ll receive a warning and will not be able to proceed.
Step 5: (Optional) Add Items from the Marketplace
-
Some events offer add-ons like social events, meals, or extra sessions.
-
Click a Marketplace item to view full details.
-
Select quantity or any options if required.
Step 6: Agree to Terms
-
Read and agree to the terms and conditions to proceed.
Step 7: Review or Update Personal Information
-
Your details are pulled from your CE Zoom profile.
-
If anything needs updating, click “Update My Profile Info,” make changes, and click “Save Changes.”
⚠️ A valid ZIP code is required to complete registration, due to state-specific tax collection.
Step 8: Apply Promo Code (if applicable)
-
Click “Apply Promo Code” and enter your code.
-
If the code is valid, the discount will apply.
-
If invalid, you'll see:
⚠️ Promo code not accepted. It might be expired, inactive, maxed out, or entered with the wrong capitalization.
-
To try a different code, click the red “Remove Promo Code” button and re-enter.
-
Step 9: Complete Payment
-
Fill out the Stripe payment form, agree to the payment terms, and click “Pay.”
-
If your registration spins or won’t complete, return to your personal information step and double-check that your ZIP code is valid and correctly saved.
Step 10: Confirmation & Dashboard Access
-
Once payment is complete, you’ll be directed to your confirmation page.
-
Your selected courses will now appear in your CE Zoom dashboard under “Courses That Are Part of a Bundle/Conference.”